Pages

Saturday, January 23, 2016

Hot Cocoa Mason Jars


I recently made some Hot Cocoa Mason Jars for friends and family. There are so many recipes online, but I used powdered sugar, real cocoa, powdered milk (which was hard to find) and some salt and powered creamer. I also used a free printable with the ingredients, which I found online. 

I decorated the mason jars with twine, burlap and denim flowers that were made with my Big Shot, and Chalk Paper Cardstock for the tops:


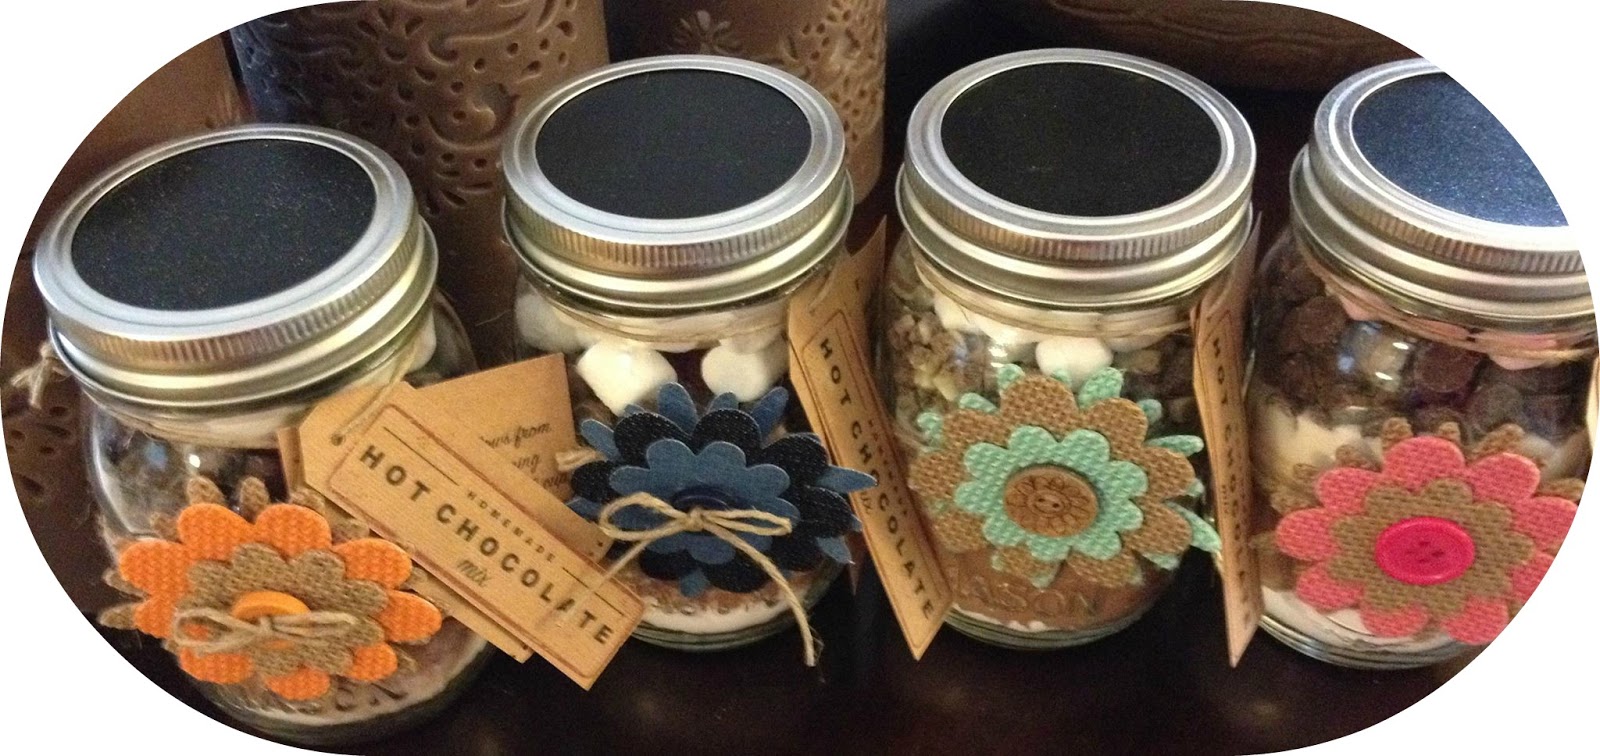
Also, the flavors coordinated with the flower colors: 

  • Orange and blue for plain marshmallow and chocolate chips; 
  • Green for Mint (the good stuff, crushed Andes Creme De Menthe baking chips); 
  • Pink for Peppermint marshmallows).


Built for Free Using: My Stampin Blog

Reindeer Noses vs Santa/Elves/Reindeer Cocoa Cones

I thought about making some "Snowman Poop" (packaged marshmallows) or "Reindeer Poop" (packaged raisinettes), but recently came across Reindeer Noses -- so cute! I used Stampin' Up! food save packaging, malt balls for reindeer noses and chewy Cherry Sours for Rudolph's nose.

I topped the treat bag with some cricut-cut reindeer from Winter Frolic, and finished them off with a google-ly eye and a glitter red nose.

This was not a good seller -- and I ended up giving away most.

What did sell -- what a surprise -- were Santa, Elves and Reindeer (not shown) Cocoa Cones:


Reindeer Food in Test Tubes


Oh reindeer food is always a hit at a vending event. In cute little test tubes, capped with cork, with an adorable tag and ribbon, who can pass it up?  The photo above is small, but the tubes are in the Santa basket, in the center of pic. Ignore the AC piping behind me, I had too (LOL).

I ordered 100 test tubes and not sure how many cork. Not really sure if that is what I got because I didn't count them and had left over cork:
I made the oatmeal and glitter mix with my boys, and they had fun helping me. If I were able to find chunky red glitter, I would have used it, but this type shows up enough (and yes, I practically used a full pound of glitter for 100 tubes).


I am pasting the text for the reindeer tag text -- only because when I googled it, I couldn't find just text, only graphics. And I wanted to use my Stampin' Up! punch with it, so I had to size it right:

Reindeer Food
Sprinkle on the lawn at night
The moon will shine and make it bright
As Santa’s reindeer fly and roam
This will guide them to your home


Holiday Vending 2015 Roundup

Here's my Holiday Vending Roundup, posting it so I can access it next year. I will update these posts to show you what sold well -- and what did not.


  1. Hershey Santa, Elves & Grinch Bars
  2. ModPodge Spiral Post Its
  3. M&M Treat Sticks and Toppers
  4. Reindeer Food in Test Tubes 
  5. Reindeer Noses and Santa, Elves, and Reindeer Cocoa Cones

Hershey Santa, Elves & Grinch Bars

So I have been searching Hershey Santa Bars like crazy -- and I have found printables and only a few links to these handcrafted items. Yes, I was frustrated. With one week until Christmas vending events, I needed to know specs now. So I came across the whimsy wraps website. So incase that this link too disappears, I will post my specs for you, based on the whimsy wraps. And yeah, if you don't want to craft these yourself, buy some from them.

Here are my measurements:
  1. Wrapper: 5.5 x 5.25
  2. Santa's write coat trim: 2x3 1/2, if you are using a edge punch on both sides; 1 1/2 if you want it straight, no punching
  3. Belt: 5.25 x 1 inch
  4. Buckle: 1 3/4
  5. Buckle interior: 1 inch on all sides
Anyhow, this took some tweaking, but here is the glittered up version for my kids' Christmas stockings:

I used that ultra thick American Crafts card stock, but it was difficult to cut to size (needed my heavy-duty guillotine trimmer). Go out and get some Recollections glitter paper -- much easier to use!

And these are the bars for my vending events: The Grinch with Santa hat )I tried to make him look mean, but he looks happy), Satna's Elves, and Santa, all glittered up.


ModPodge Spiral Post Its

Here's my ModPodge Spiral Post Its...

I found 4x4 coasters online and used 3x3 Post Its. I first Modpodged the coasters with matte and then added DSP papers from Stampin' Up. I used the school line for teachers gifts and then just pretty prints. I then sanded the edges, so the coasters on the edges showed. Then I added glossy Modpodge -- and few times! Make sure after each coat to let them dry completely -- or "cure"...It swill take days, but it is worth the wait. Another thing -- I wasn't happy with brush strokes or foam strips from either application. The roller sponge is great -- I rolled enough to remove any bubbles and get that really cool coating.

Here they are, but I have added some ribbon to embellish them a bit more:


Built for Free Using: My Stampin Blog

M&M Treat Sticks and Toppers

This is my first attempt at M&M Treat Sticks and Toppers. I used the Stampin' Up! food safe 1x8 cello bags. I have since found out that some people have made a paper funnel to get those pesky M&MS in the cello bag...So in in future, I will do it that way. 

I made three different toppers:
  • Deer die cuts from Hampton arts (I don't yet have the snowflake punch that so many vendors have used for the antlers)
  • Owl Punch Penguins -- because my son loves penguins.
  • And blue and white snowflakes, using both stamp and die from Hampton Arts.


Built for Free Using: My Stampin Blog

Wednesday, January 20, 2016

Cricut Explore Gatefold Rose Card

I came across a beautiful FREE cut in Cricut Design Space yesterday --- and thought, it is perfect for Nicole's birthday card. I am shocked at how the Air handled this intricate cut! Honestly, there are maybe two cuts that aren't too clean, but I think hardly noticeable. Did you notice it?

And I threaded some twine to keep the covers closed. Pink twine would have been my first choice, but beggars can't be choosers ;)

Friday, January 15, 2016

A Rose Swap Card

A Rose Swap Card for my Stampin' Up Side and Upline Demonstrators. So how did I do this? I took the hard way out! I have just seen some beautiful cards with this die -- the Rose Garden Thinlits Dies -- and they make this rose so easy. Well, I 
  • Cut the rose on gold foil paper
  • Stamped the Salebration marble flip side -- the watercolor side --of the Perfectly Artistic Designer Series Paper with the Rose Wonder Photopolymer stamp set
  • Fussy cut the rose and leaves (the leaves were the green marble side)
  • Adhered to the brown marble paper and onto one of the current Neutrals 8-1/2" X 11" Cardstock
  • For the sentiment, I used the Rose Garden Thinlits Dies with Jet Black Stazon.
For the sentiment, I used Staz-On ink on the foil cut from the same Rose die set.

Here's my supply items:

Built for Free Using: My Stampin Blog